Rabbit Angiotensin II (AngII) Quantitative Detection Kit (ELISA) user's Guide ã€Kit name】 Rabbit Angiotensin II (AngII) Quantitative Detection Kit (ELISA) ã€Use of the kit】 Quantitatively detect the content of angiotensin II (AngII) in rabbit serum, plasma and related liquid samples. ã€Detection principle】 This kit uses double antibody one-step sandwich enzyme-linked immunosorbent assay (ELISA). The standard, the test sample and the enzyme-labeled working solution were added to the transparent enzyme-labeled plate pre-coated with rabbit angiotensin II (AngII) antibody, and after incubation for a sufficient time, unbound components were washed away. Add the developer A and B in turn. The developer (TMB) is converted into a blue product under the catalysis of horseradish peroxidase (HRP), and turns yellow under the action of acid. The concentration of angiotensin II (AngII) was positively correlated. The OD value was measured at a wavelength of 450 nm. Based on the OD value of the standard and the sample, the content of rabbit angiotensin II (AngII) in the sample was calculated. ã€Composition of the kit】 1 Enzyme coated plate 12 holes × 8 7 Developer A liquid 6mL 2 Standard product: 480pg / mL 0.6mL 8 Developer B liquid 6mL 3 20 times concentrated washing liquid 25mL 9 Stop solution 6mL 4 Standard dilution 6mL 10 Instructions 1 serving 5 Sample diluent 6mL 11 Sealing film 2 sheets 6 Enzyme reagent 6mL 12 sealed bag 1 Remarks: The standard product is diluted with standard product diluent in order: 480, 240, 120, 60, 30, 15 pg / mL [Reagents and equipment needed but not provided] 1. 37 ℃ thermostat 2. Standard specification microplate reader 3. Precision pipettes and disposable tips 4. Distilled water 5. Disposable test tubes 6. Absorbent paper ã€Steps】 1. Preparation: Remove the reagent kit from the refrigerator and re-equilibrate at room temperature for 30 minutes. 2. Mixing solution: dilute the 20-fold concentrated washing solution with distilled water to the original one. 3. Add standard products and samples to be tested: take a sufficient number of enzyme-coated plates and fix them to the frame. Set up standard wells, sample wells to be tested and blank control wells, record the positions of each well in the standard wells. Add 50μL of the standard; add 10μL of the sample to be tested to the sample well, and then add 40μL of the sample diluent (that is, the sample is diluted 5 times); add 100μL of enzyme-labeled working solution to each well; no blank control well. 4. Incubation: Incubate in a 37 ° C water bath or thermostat for 60 minutes. 5. Wash the plate: discard the liquid, pat dry on the absorbent paper, fill each well with the washing liquid, let stand for 1min, shake off the washing liquid, pat dry on the absorbent paper, repeat the washing of the plate 5 times (you can also use the washing machine to press Instructions for washing the board). 6. Color development: add 50 μL of developer A solution to each well, then add 50 μL of developer B solution, and develop color at 37 ° C in the dark for 15 min. 7. Termination: Remove the enzyme labeling plate and add 50μL of stop solution to each well to stop the reaction (the color changes from blue to yellow). 8. Determination: Zero the blank holes, and within 15 minutes after termination, measure the absorbance (OD value) of each well with a wavelength of 450 nm. 9. Calculation: According to the concentration of the standard product and the corresponding OD value, calculate the linear regression equation of the standard curve, and then calculate the corresponding sample concentration on the regression equation according to the OD value of the sample. You can also use various application software to Calculation. The final concentration is the actual measured concentration times the dilution factor. [Sample requirements] 1. The sample cannot contain sodium azide (NaN3) because sodium azide (NaN3) is an inhibitor of horseradish peroxidase (HRP). 2. The specimen should be extracted as soon as possible after collection. The extraction should be carried out according to relevant literature. The experiment should be carried out as soon as possible after extraction. If the test cannot be performed immediately, the specimen can be stored at -20 ℃, but repeated freezing and thawing should be avoided. 3. The sample should be fully centrifuged, without hemolysis and particles. ã€Precautions】 1. The experiment is carried out in strict accordance with the instructions, and the result of the experiment must be determined by the reading of the microplate reader. 2. If the enzyme-labeled coated board is not used up after opening, it should be put into a sealed bag and added with desiccant immediately. 3. It is recommended that all standards, samples and blank controls be tested in duplicate, and the average value is taken to reduce the experimental error. 4. If the color is too light, the substrate incubation time can be extended properly. 5. In order to avoid cross-contamination, the standard, sample and blank control should be replaced with a tip for each additional one; the common components such as enzyme working solution, sample diluent and substrate should be added by cantilever, and should not touch the microwell ; Do not reuse the sealing film. 6. The kits are used within the warranty period, and different batches of reagents should not be mixed. 7. Substrate B is sensitive to light and avoid prolonged exposure to light. [Summary of operating procedures] Prepare reagents, samples and standards Add the prepared samples, standards and enzyme standard working solution, and react at 37 ℃ for 60 minutes Wash the plate 5 times, add color developing solutions A and B, and develop at 37 ℃ for 15 minutes Add stop solution Read OD value within 15 minutes Calculation ã€examination range】 15-480pg / mL ã€specification】 96 servings / box ã€Storage】 Store at 2-8 ℃, protected from light and moisture. ã€Validity】 6 months
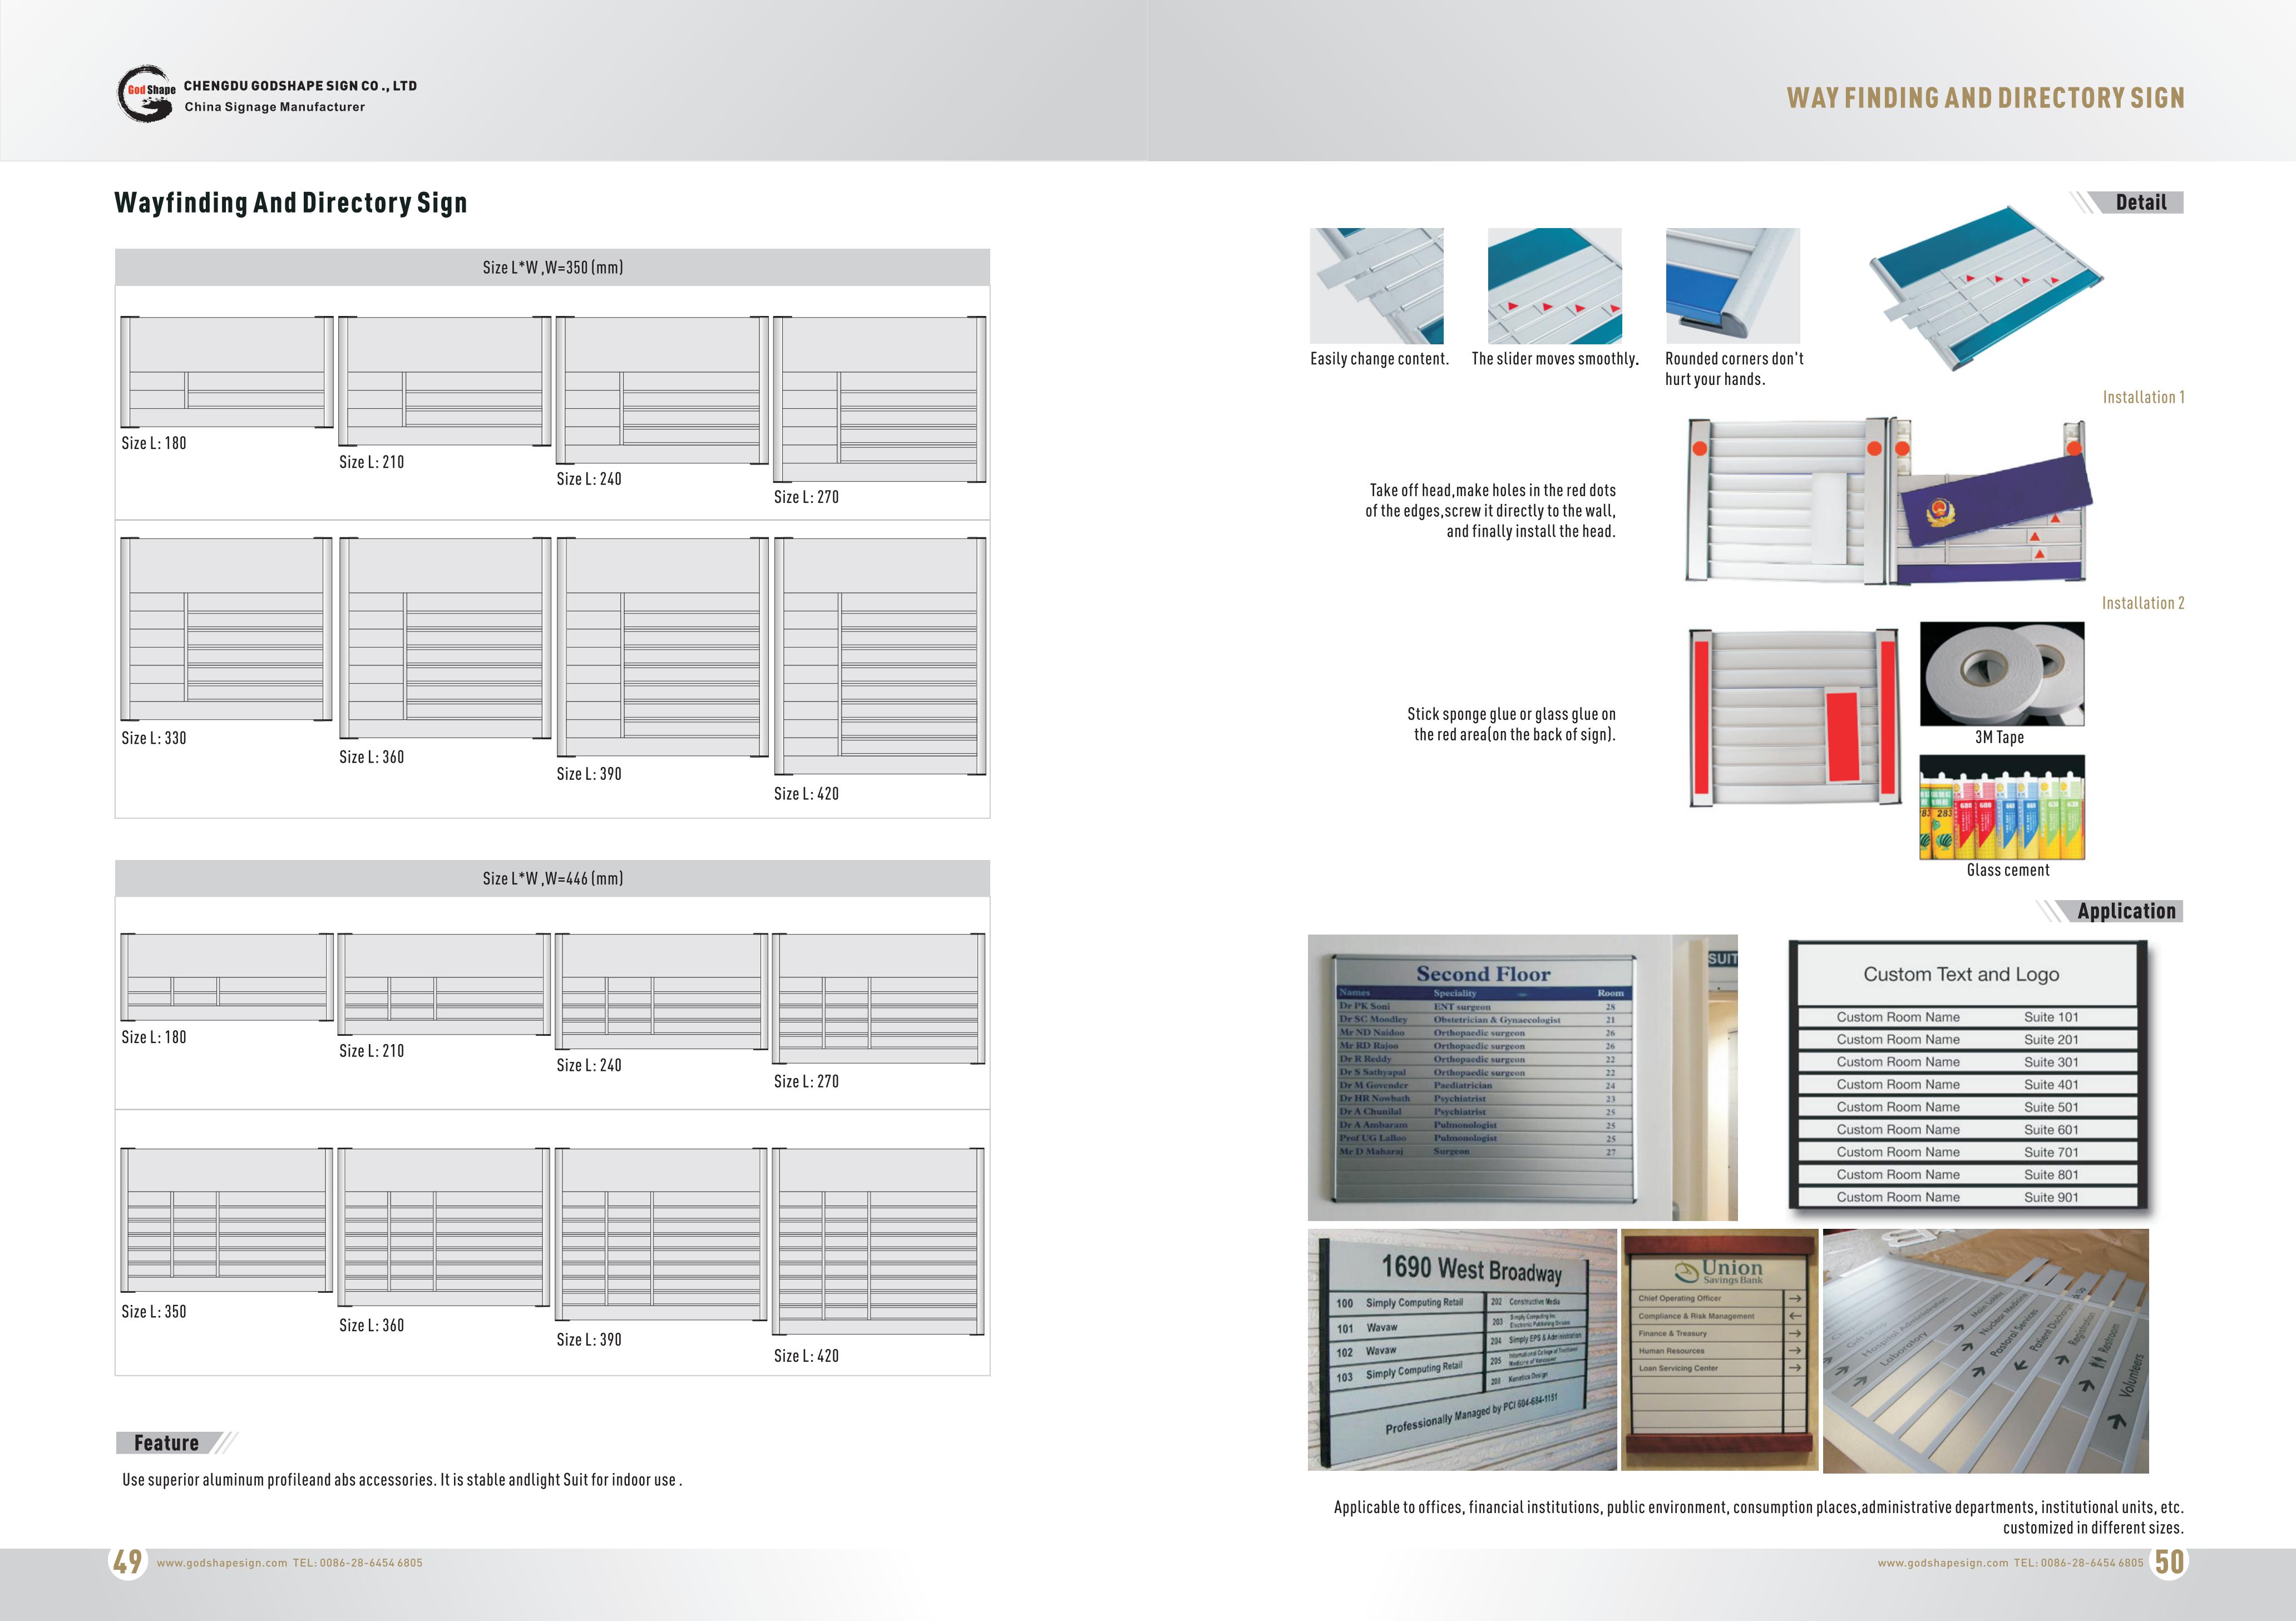
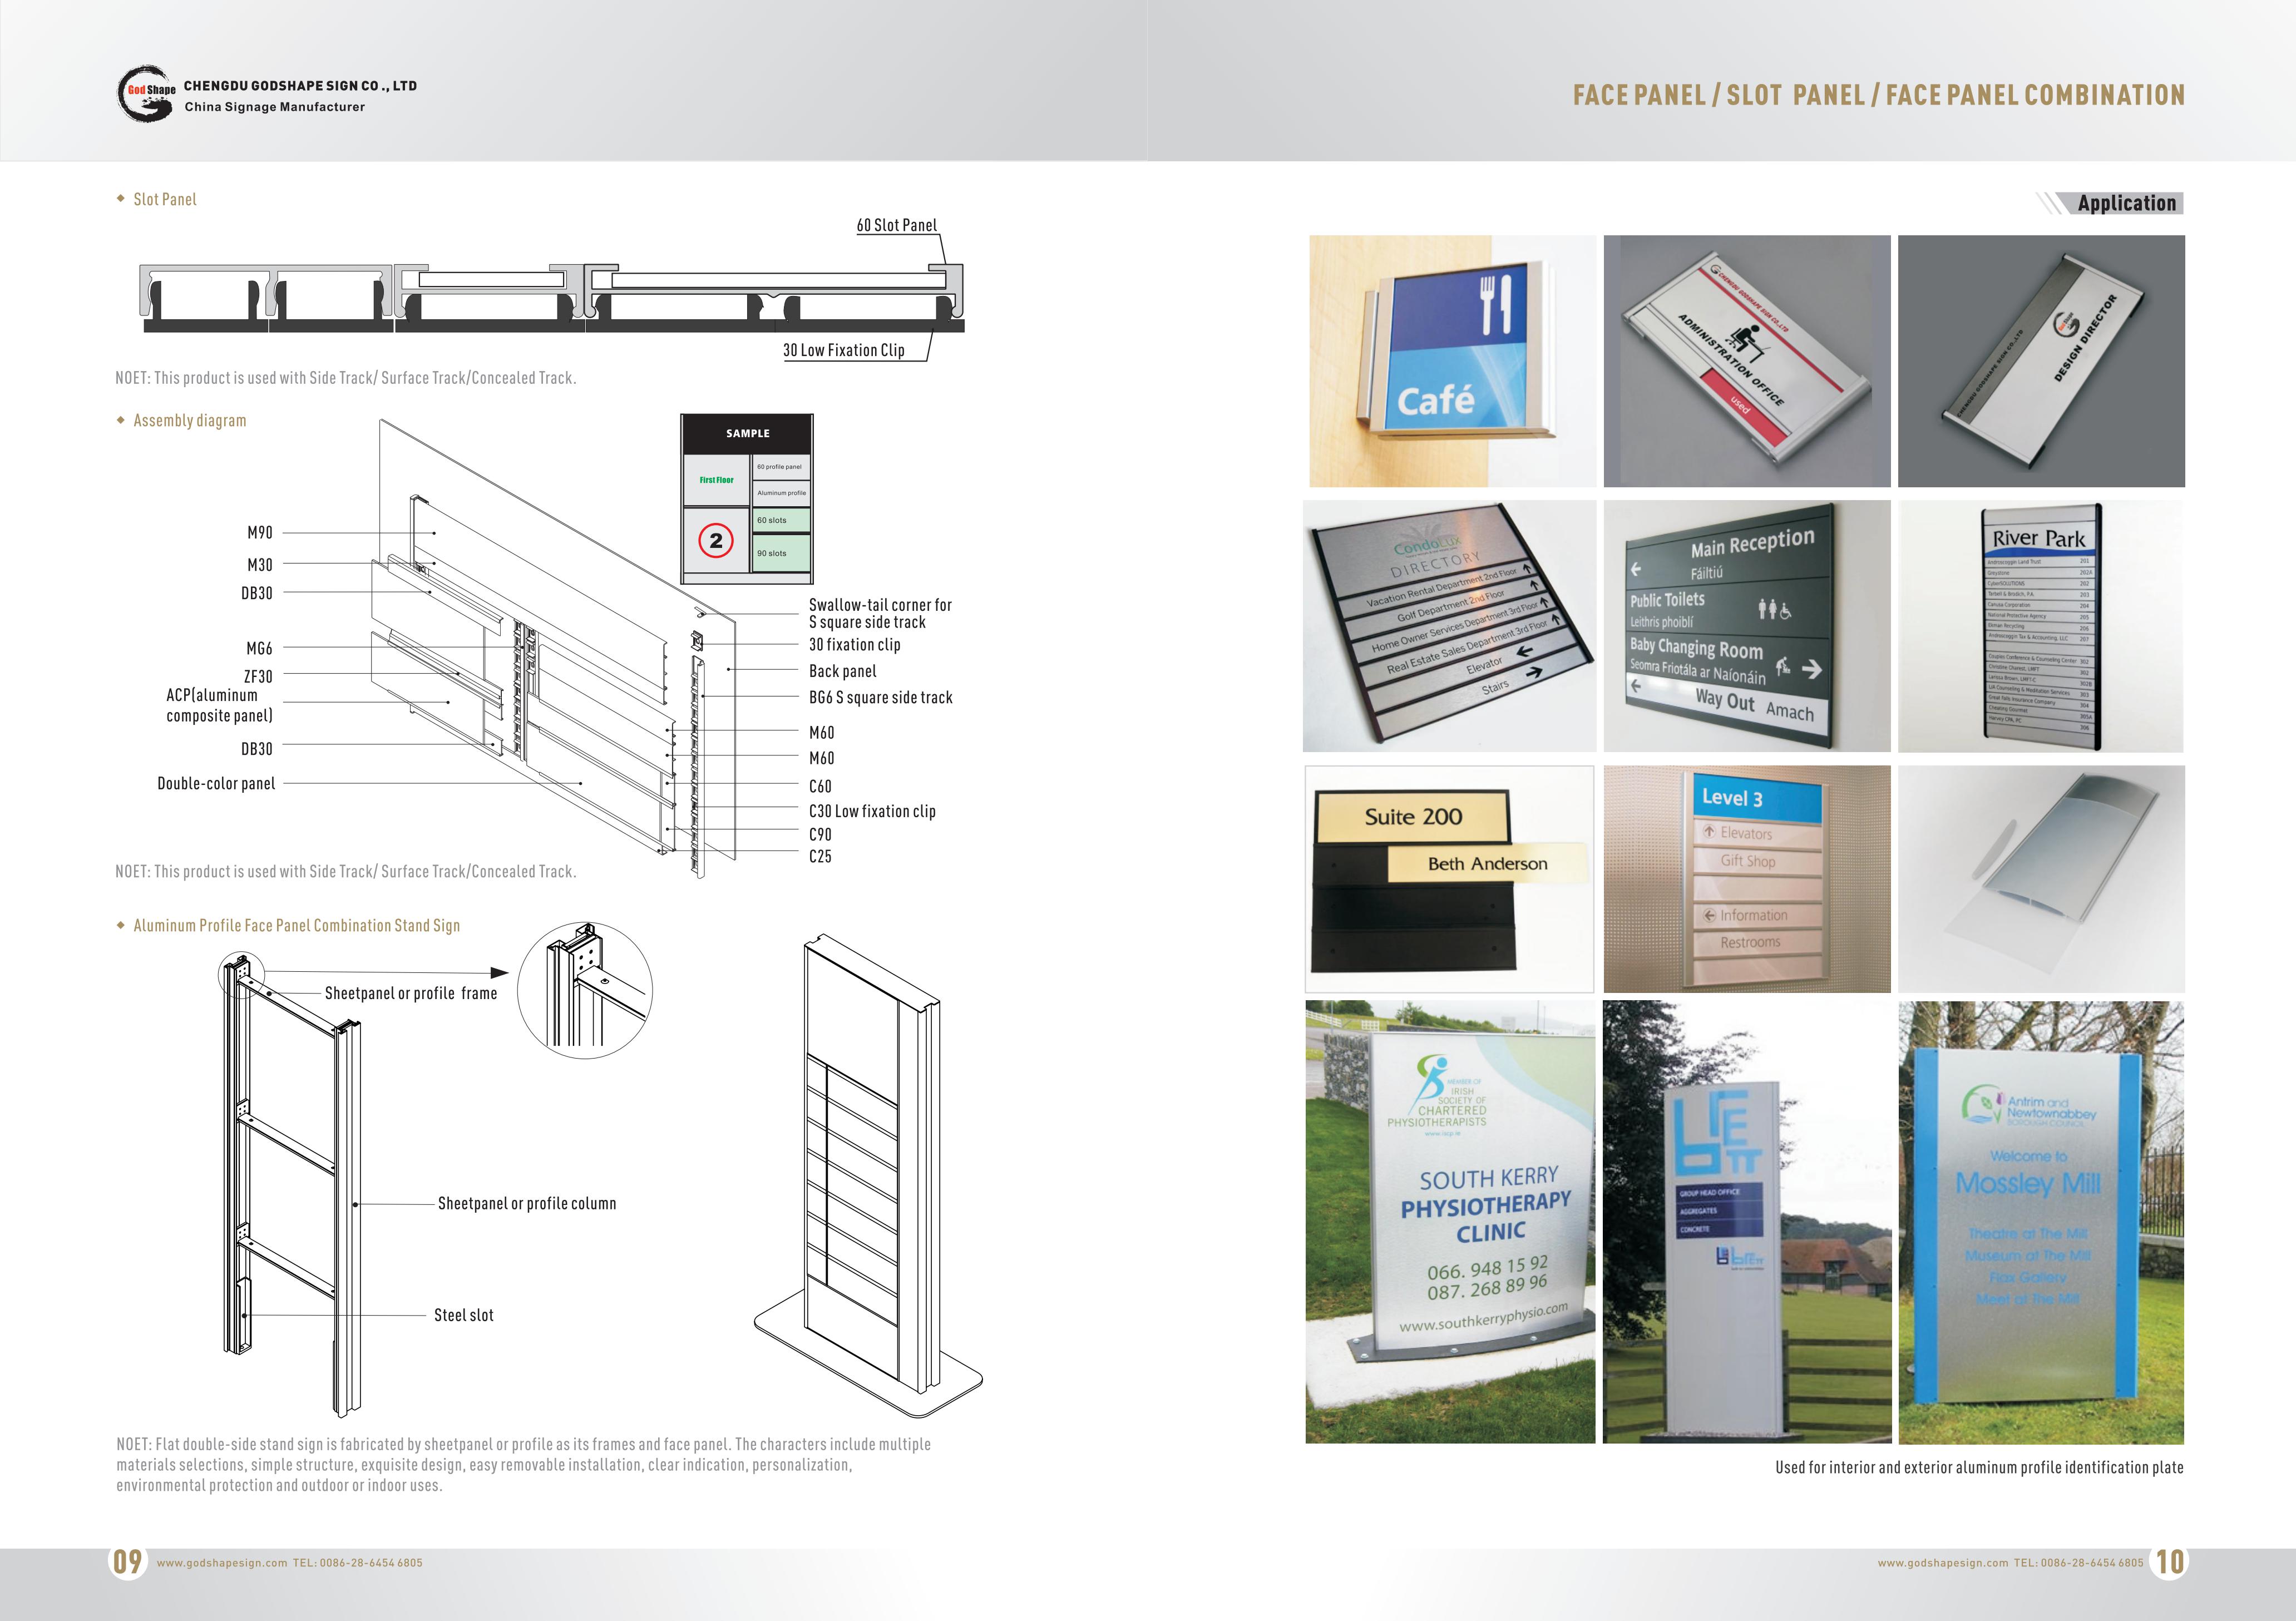
There are four types of wayfinding signs: identification, directional, informational, and regulatory. As standalone signs, they serve a specific role; as part of the greater wayfinding system, they inform each other.
Here`s what facility managers need to know about deploying each of the primary wayfinding types of signage.
Identification is the most common type of wayfinding signage. They tell a person when they have arrived at their destination. They also serve as general wayfinding landmarks.
Need to get your bearings? Identification signage is there for you. If you`re looking for Sales and you keep seeing signs for Human Resources, you know you`re in the wrong place.
Make identification signs uncluttered and straight to the point. What does the sign signify? Someone should understand it in seconds.
General examples
Directional signage helps people get to where they`re going. It`s an invisible hand guiding them from wherever they are to their destination, one step at a time. They`re best used at junctions and areas without a clear traffic flow.
Anyone unfamiliar with their surroundings benefits from diverse directional signage. It can be as simple as a plaque at each junction sending people left or right. Or, it may be as comprehensive as colored lines on the floor leading people directly to their destination.
Continuity is key for directional signage. If a person becomes lost anywhere between two points using directional signage, it`s immediately invalidated. Picking up the trail again means backtracking or getting lucky.
General examples
Whereas identification signage marks a particular area, informational signage pertains to the overall facilities. These signs give people broad information they need while navigating.
Informational signage is best placed in an area with broad exposure. Lobbies, waiting rooms, building entrances, and atriums are popular examples. Signage should answer questions before they`re asked. Where are your bathrooms? How late are you open? Do you have an elevator?
Informational signs should be universally understandable at a glance-signs and symbols anyone can understand.
General examples
Regulatory signage is a proactive form of wayfinding. It`s focused on safety and liability concerns and sets boundaries-what is and isn`t acceptable in your facilities. It`s used to establish and reinforce rules, safety standards, and privacy expectations.
Regulatory signage is generally big and bold. No frills-only a clear, concise, prominent message. Someone probably won`t open a closet if there`s a [Caution! High Voltage!" sign on the door. Similarly, displaying a [No Pets Allowed" sign means Fido isn`t welcome.
Use regulatory signage wherever it applies and leave no room for ambiguity. A handicap sign sets a clear precedent, just like an [Employees Only" sign on a locked door.
General examples
Every type of wayfinding signage can and should be used with every other. Regulatory signs should keep people out of restricted areas as they follow directional signage to their destination. Identification signage should tell someone where they are, so they can follow directional signage to where they want to be. Informational signage-coupled with regulatory signage-needs to set behavior expectations in your facilities.
Additionally, all signage should be simple. Regardless of its purpose, someone should be able to look at a sign and known in seconds what it says, as well as what it means in relation to wayfinding.
Whatever the information, make sure you have the right mode of delivery. The simpler your signage and the more cohesive it is across all four types, the more effective it will be for anyone using it.
Directional Sign,Floor Index Sign,Project Sign Panel,Modular Wayfinding Sign Plate Chengdu GodShape Sign Co., Ltd , https://www.signsgs.com
1. Identification
2. Directional
3. Informational
4. Regulatory
Combining wayfinding signage


Rabbit Angiotensin II (AngII) Quantitative Detection Kit (ELISA)